
Grafting Tree Peonies
From mid August to early October is the time to graft tree peonies in our USDA zone 6. Grafting is the most efficient means of reproducing a new clone of an existing tree peony variety. This is an ancient technique whereby the bud of the desired variety is fused onto an under-stock of either tree or herbaceous peony root. This nurse root serves as a ‘battery’ which powers the new growth for a year or two before it develops its own roots.style="display: block; float: none; margin-left: auto; margin-right: auto;"
One of the main reasons tree peonies remain expensive plants is that grafting, a labor intensive and slow process, remains the most effective means of asexual propagation, or cloning. Tree peonies reportedly can be rooted from summer cuttings (SOURCE!), but success requires humidity and temperature to be carefully controlled. This is very difficult and not done in any production setting we are aware of. There have been some reports of success in cell tissue micropropagation of tree peonies, though large-scale success has thus far proved elusive. Age-old grafting techniques are the preferred method of propagation of tree peonies in Japan, China and the U.S.
Grafting will remain an essential skill for gardeners to propagate woody plants, as it has been for centuries. We present here a low tech method with little specialized equipment for those dedicated gardeners who seek to propagate their own tree peonies.
Grafting tree peonies is similar to other kinds of grafting, but also differs in a few key ways. The following is the method we use at Cricket Hill Garden.
Preparing Tree Peony Scions and Herbaceous Peony Roots
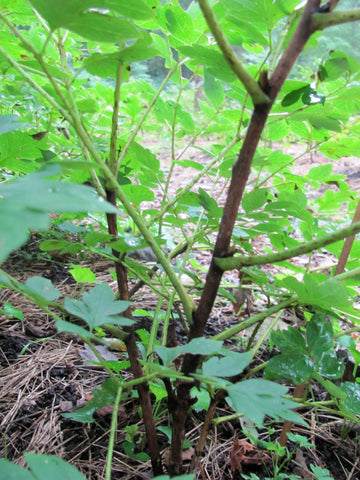
Cuttings can be taken from tree peonies from mid-August through early October. In this period the buds have reached a good size and the stem have yet to become too woody. Select large terminal buds for cutting. These cuttings are known as “scions”. Each scion should contain at least one terminal bud. If you can get a secondary bud as well, all the better.

After cutting your scion, trim off the leaves. Leave buds lower down on the branch to develop. Realize that in cutting the terminal buds, you are cutting off next years flower buds. This may be hard for any peony grower to accept, though a new tree peony may be of some compensation.
If you are not going to do you grafting immediately, you can store the scions wrapped in a damp paper towel in a sealed plastic bag in the refrigerator. Scions stored in this manner should be viable for several weeks.
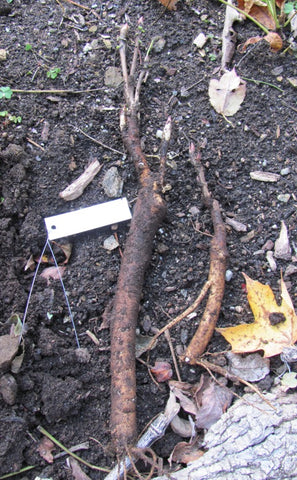
The best herbaceous roots are 2-year-old seedling which have been ‘decapitated’ of their ‘eyes’. Seedling roots are the most vital. If you do not have seedlings, a good healthy piece of root from any herbaceous peony will work very well. To obtain roots from a well established plant, you can either dig up a whole plant and cut what you need or extract a few roots by digging around the clump. For each graft you will need a 5-7” pieces of healthy and undamaged herbaceous root. Be sure that you keep track of the terminal end of the root.

It’s best to pick and clean your herbaceous roots the day before you intend on grafting. Store them in a cool, damp place. This will allow them to become a bit less brittle and a little more elastic when you are ready to graft. Freshly harvested herbaceous roots can also be used but are quite brittle.
Tree peony roots, usually of ‘Phoenix White’ can also be used as under-stock. These are much more difficult to work with than herbaceous roots and are not recommended.
There are many different kinds of cuts which can be made to secure the tree peony scion to the herbaceous root. Make sure to sterilize your blades with alcohol before doing each graft. We will discuss the two which he have had good success with at Cricket Hill Garden.
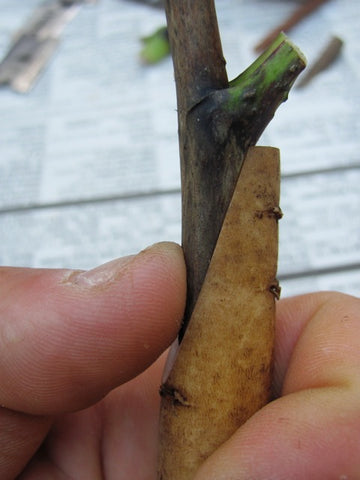
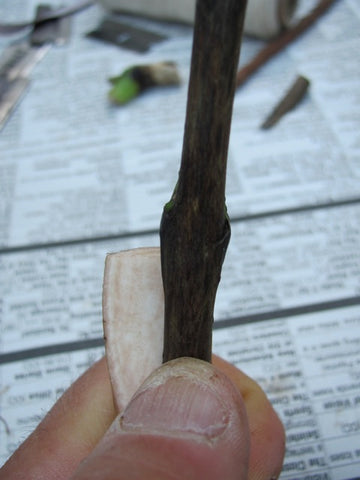
Side Graft
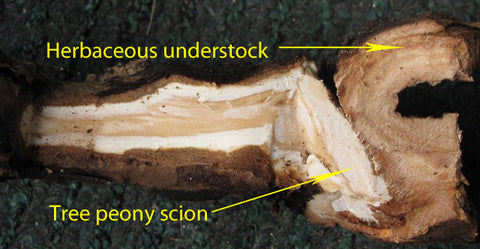
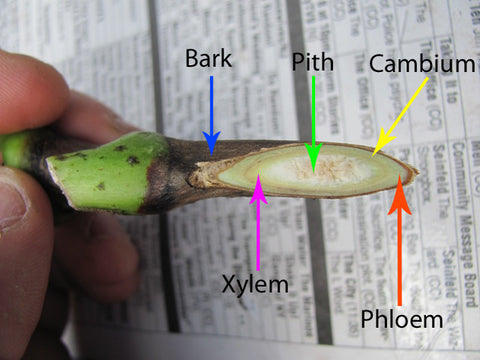
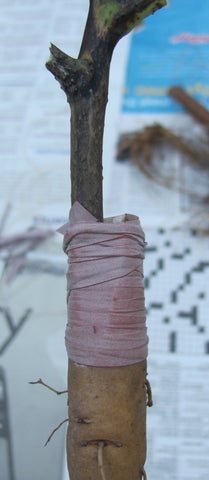
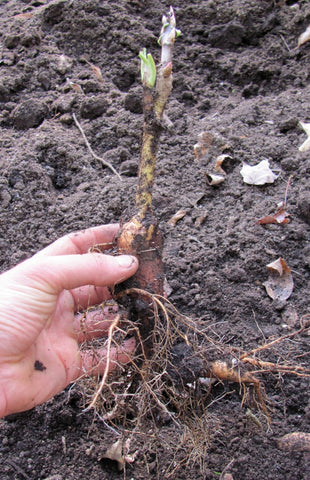
Cut scion and rootstock at complimentary angles. Make sure that your cuts are on a level plain so that there will be good contact. The aim is to have the cambium layers of the tree peony scion and herbaceous understock match up. The cambium layer consists of the undifferentiated cells of the vascular system of the plant and is where growth occurs. In a successful graft the vascular cambia of the scion and rootstock grow together.
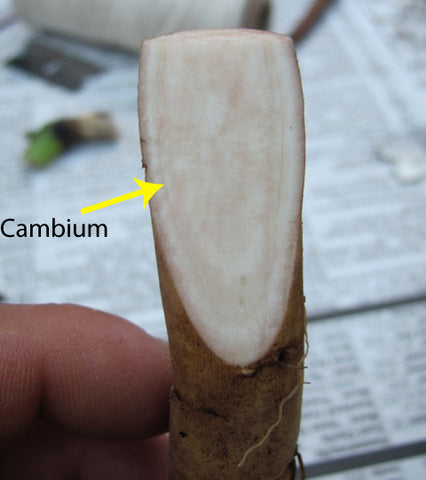
The goal is to have the cambium layer of the scion and the rootstock match up.
Don’t futz around trying to get the scion and rootstock to fit just right. The Chinese say the excessive rubbing of the cut surfaces decreases the change of the graft taking. Better to practice making sharp, clean cuts before attempting grafts for the first time.
Even high volume commercial operations do not achieve 100% success in tree peony grafting. Our first year we had about 70% of our grafts come up in the spring, last year was lower, but that is because we began too early in the summer. Hopefully this year we will achieve 80-90% success.
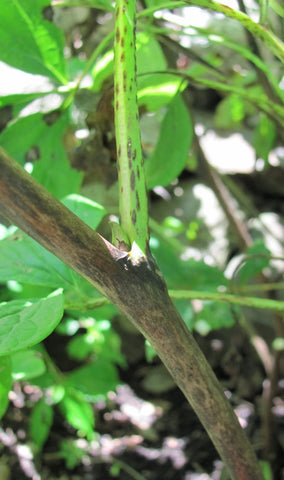
Tie up with rubber band. We use specialty grafting rubber bands, though a plain old office rubber band will also do.
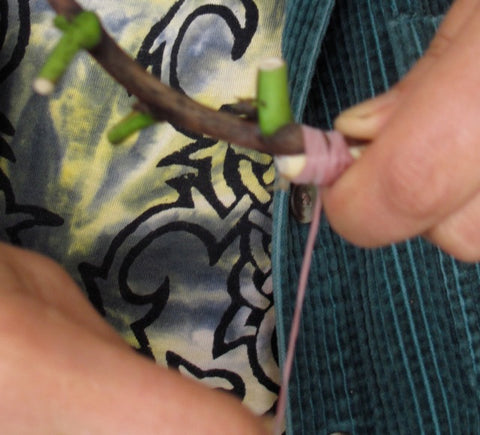
Most tutorials on tree peony grafting have you cover the rubber band and wound area with grafting tape or polyfilm before setting aside to heal. We do not feel that this step is necessary because we heal the grafts for a short time at a high heat as opposed to a relatively longer period at room temperature.
Healing the Grafts
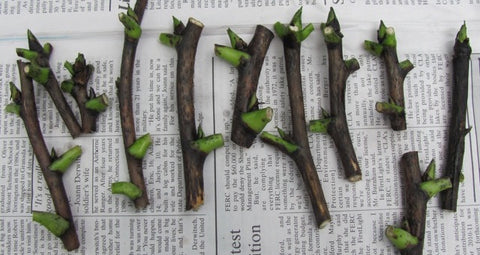
After you have tied up your grafts, they need to be healed. We have found the best way to do this is for a short time at a high heat. Place grafts in a 4” deep tray with clean, slightly damp sand at the bottom. The sand must not be too wet or the grafts will fail. Cover grafts with at least 1” of damp sand.

Keep the sand covered grafts at 70° F for six or seven days. We use a heat mat to do this. Ensure that the sand remains damp by occasionally misting the top and covering with a piece of plastic. If the medium is too wet or too dry the grafts may fail.

After six days, the grafts will have ‘taken’ and the healing will have begun. We find that if the tree peony buds are still firm there is a good chance that the graft was successful.
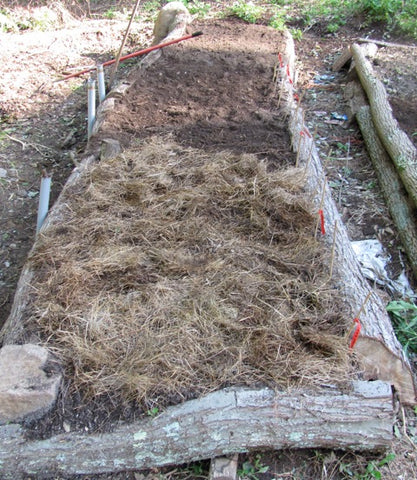
Select a planting location which is has deep, well drained soil (pH at least 6.5) and receives about 6 hours of sun.
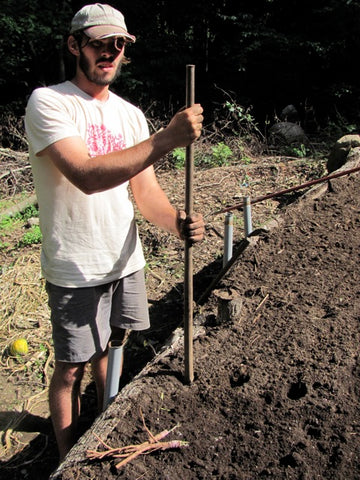
Plant grafts so that top bud is 2-3” beneath the soil, space grafts 8” apart in 1′ rows.
Mulch with a light layer of straw or leaves to help retain moisture. Right before or after the ground has frozen in the late fall cover your graft bed with a a layer of clear plastic and add additional mulch on top of this. We do this in November.
In the Spring…
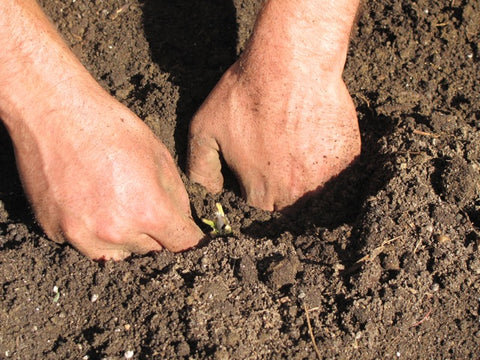
Uncover your grafts by removing all mulch in mid to late March or when the crocuses bloom. The young shoots should be poking through the soil at this time.
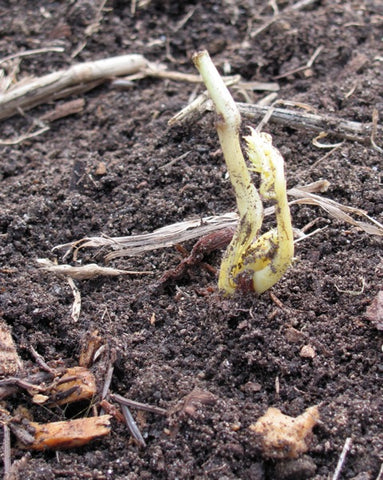
Expect first year grafts to grow to 8-16”. Some may even form viable flower buds, though it is best to pick these off at an early stage so that the plant does not waste energy on a small flower. Begin to fertilize in the later spring after the leaves have turned fully green.
 The amount of first year growth is contingent on a number of factors; ranging from scion and understock size to planting conditions and the relative vigor of a given variety.
In the fall of the first year, you may want to further space out your grafts. Space to 2′. Remove rubber bands. If the graft has not developed any tree peony roots by this point, replant it deeper, at least 4” above the graft union.
Grafted tree peonies which are not planted deeply enough often never develop tree peony roots and will fail to thrive.
Supplies
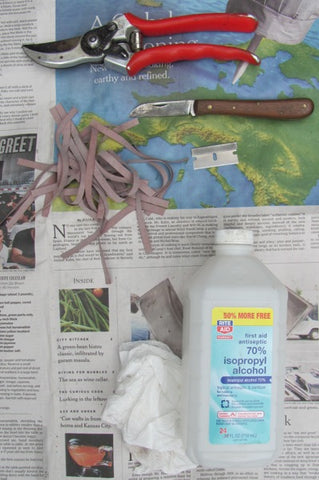
- Sharp grafting knife or straight-edge razors
- sharp gardening snips
- isopropyl alcohol (to sterilize cutting instruments)
- paper towels
- rubber bands or hemp twine (specialty grafting rubber bands are available from nursery supply companies, but plain old rubber bands will also do)
- herbaceous peony roots
- tree peony scions (bud cuttings)
- tray with damp, clean sand
- heat mat (not strictly required, if there are other means of keeping grafts at 70 degrees for the healing period)
N.B.
‘Itoh’ or intersectional hybrid tree peonies can also be reproduced by grafting using the technique described here.
Tree peonies can also be propagated by means of root layering and division.
Many years ago, after an icy winter with much branch damage, we experimented with spring grafting of tree peonies. Unfortunately, all but one of these failed, though this could have been for a number of reasons. The scions were picked from winter damage and could have been dessicated, also the root stock was very small. Bottom line is that grafting is best done in the fall.
Some other links of interest on tree peony grafting
A good tutorial prepared by the Mid-west peony society.
An article by English peony grower Jo Bennison on tree peony grafting.